centos extmail postfix nginx 安装配置详解

到目前为止,extmail官方还没有出CentOS6的包,网上有些用rpm来安装CentOS6下extmail的缺少安装包,即使这样装了,还是有好多问题,下面在CentOS5上面装了一个extmail。安装之前,把selinux关闭掉,iptable暂时关闭,等extmail都配置好了,在开放需要开放的端口
一,extmail包含的软件包
操作系统 CentOS 5.5 CentOS和RHEL是一样的,而且升级免费
邮件传输代理(MTA) Postfix 邮件系统主程序
WebMail 系统 Extmail 支持多语言、全部模板化,功能基本齐全
Web 账户管理后台 Extman 支持无限域名、无限用户
邮件投递代理(MDA) maildrop 支持过滤和强大的功能
其它数据认证库 courier-authlib 负责courier-imap,maildrop 的认证
SMTP 认证库 cyrus-sasl 标准的SASL实现库,支持courier authlib
POP3 认证库 courier-imap Pop3 ,IMAP 认证功能
二,配置extmail源,新增加一个文件EMOS-Base.repo
[root@localhost ~]# cat /etc/yum.repos.d/EMOS-Base.repo
# EMOS-Base.repo#
# Created by ExtMail Dev Team: http://www.extmail.org/
#
# $Id$
[EMOS-base]

name=EMOS-Base
baseurl=http://mirror.extmail.org/yum/emos/1.5/os/$basearch/
gpgcheck=0
priority=0
protect=0

[EMOS-update]
name=EMOS-Updates
baseurl=http://mirror.extmail.org/yum/emos/1.5/updates/$basearch/
gpgcheck=0
priority=0
protect=0
不用extmail源,extmail中的很多包是找不到的。添加好了后别忘了yum clean all
三,安装extmail相关软件包
安装前先把sendmail清理掉,centos5系统默认安装的是sendmail
rpm -e --nodeps sendmail
yum install Nginx postfix mysql mysql-server courier-authlib courier-authlib-mysql courier-imap maildrop cyrus-sasl \
 cyrus-sasl-lib cyrus-sasl-plain cyrus-sasl-devel extsuite-webmail extsuite-webman spawn-fcgi fcgi-devel fcgi
Dependencies Resolved //部分数据包如下
===============================================================================================================================
 Package                                 Arch                 Version                            Repository               Size
===============================================================================================================================
Installing:
 courier-authlib                         i386                 0.62.2-1                           EMOS-base               136 k
 courier-authlib-mysql                   i386                 0.62.2-1                           EMOS-base                13 k
 courier-imap                            i386                 4.5.0-3                            EMOS-base               382 k
 cyrus-sasl                              i386                 2.1.22-8                           EMOS-base                77 k
 cyrus-sasl-devel                        i386                 2.1.22-8                           EMOS-base               350 k
 cyrus-sasl-lib                          i386                 2.1.22-8                           EMOS-base               1.1 M
 extsuite-webmail                        noarch               1.1.0-1hzq                         EMOS-base               720 k
 extsuite-webman                         noarch               1.0.1-2hzq                         EMOS-base               605 k
 maildrop                                i386                 2.0.4-3qk                          EMOS-base               282 k
。。。。。。。。。。。。。。。。。。。。。。。。。。。。。。。。。。。。。。。。。。。。。。。。。。。。。。。。。。。。。。。。。。。。。。。。。。。。。。。
安装时如果报错以下错误
Error: Missing Dependency: cyrus-sasl-lib = 2.1.22-5.el5_4.3 is needed by package cyrus-sasl-md5-2.1.22-5.el5_4.3.i386 (installed)
解决方法如下:
rpm -e --nodeps cyrus-sasl
rpm -e --nodeps cyrus-sasl-md5
rpm -e --nodeps cyrus-sasl-lib
安装fcgiwrap,它是用来运行perl的cgi程序的,extmail是用perl写的,当时装nagios的时候,装过一次,nagios也是perl写的。
fcgiwrap下载地址 http://github.com/gnosek/fcgiwrap/tarball/master
 [root@localhost download]# tar zxvf 你下载的版本.tar.gz
 [root@localhost download]# cd gnosek-fcgiwrap-1328862/
 [root@localhost gnosek-fcgiwrap-1328862]# autoreconf -i
 [root@localhost gnosek-fcgiwrap-1328862]# ./configure
 [root@localhost gnosek-fcgiwrap-1328862]# make
 gcc -std=gnu99 -Wall -Wextra -Werror -pedantic -O2 -g3 fcgiwrap.c -o fcgiwrap -lfcgi
 [root@localhost gnosek-fcgiwrap-1328862]# cp fcgiwrap /usr/local/bin/
三,配置postfix
[root@localhost postfix]# cat /etc/postfix/main.cf |awk '{if($0 !~ /^$/ && $0 !~ /^#/) {print $0}}'
queue_directory = /var/spool/postfix
command_directory = /usr/sbin
daemon_directory = /usr/libexec/postfix
data_directory = /var/lib/postfix
mail_owner = postfix
myhostname = localhost
mydomain = 51yip.com
myorigin = $mydomain
inet_interfaces = all
inet_protocols = all
mydestination = $myhostname, localhost.$mydomain, localhost,$mydomain
local_recipient_maps =
unknown_local_recipient_reject_code = 550
mynetworks = 192.168.0.0/24, 127.0.0.0/8
alias_maps = hash:/etc/aliases
alias_database = hash:/etc/aliases
SMTPd_banner = $myhostname ESMTP unknow
debug_peer_level = 2
debugger_command =
 PATH=/bin:/usr/bin:/usr/local/bin:/usr/X11R6/bin
 ddd $daemon_directory/$process_name $process_id & sleep 5
sendmail_path = /usr/sbin/sendmail.postfix
newaliases_path = /usr/bin/newaliases.postfix
mailq_path = /usr/bin/mailq.postfix
setgid_group = postdrop
html_directory = no
manpage_directory = /usr/share/man
sample_directory = /etc/postfix
readme_directory = /usr/share/doc/postfix-2.6.2-documentation/readme

##################cyrus-sasl##################
SMTPd_sasl_auth_enable = yes
broken_sasl_auth_clients = yes
smtpd_sasl_local_domain = $myhostname
smtpd_sasl_security_options = noanonymous
smtpd_recipient_restrictions = permit_mynetworks, permit_sasl_authenticated, reject_unauth_destination
smtpd_sasl_security_restrictions = permit_mynetworks, permit_sasl_authenticated, reject_unauth_destination
smtpd_sender_restrictions = permit_mynetworks,reject_sender_login_mismatch,reject_authenticated_sender_login_mismatch,reject_unauthenticated_sender_login_mismatch
smtpd_sender_login_maps = mysql:/etc/postfix/mysql_virtual_sender_maps.cf,mysql:/etc/postfix/mysql_virtual_alias_maps.cf
##################cyrus-sasl##################

message_size_limit = 15728640
mailbox_transport = lmtp:unix:/var/lib/imap/socket/lmtp

##################maildrop##################
//由于maildrop不支持一次接收多个收件人,所以要添加一下以下内容
maildrop_destination_recipient_limit = 1
##################maildrop##################

##################extman##################
//配置虚拟域和虚拟用户
virtual_alias_maps = mysql:/etc/postfix/mysql_virtual_alias_maps.cf
virtual_mailbox_domains = mysql:/etc/postfix/mysql_virtual_domains_maps.cf
virtual_mailbox_maps = mysql:/etc/postfix/mysql_virtual_mailbox_maps.cf
virtual_transport = maildrop:
##################extman##################
配置extmail包的时候,好多地方要配置main.cf,上面我已经注明了,在这里参数就没有详细了,前段时间 在centos6下面搭过postfix里面有部分参数说明,请参考:postfix 安装配置详解
三,配置courier-authlib
1,修改mysql的连接文件authmysqlrc
[root@localhost postfix]# cat /etc/authlib/authmysqlrc |awk '{if($0 !~ /^$/ && $0 !~ /^#/) {print $0}}'
MYSQL_SERVER localhost
MYSQL_USERNAME extmail
MYSQL_PASSWORD extmail
MYSQL_SOCKET /var/lib/mysql/mysql.sock
MYSQL_PORT 3306
MYSQL_OPT 0
MYSQL_DATABASE extmail
MYSQL_USER_TABLE mailbox
MYSQL_CRYPT_PWFIELD password
MYSQL_UID_FIELD uidnumber
MYSQL_GID_FIELD gidnumber
MYSQL_LOGIN_FIELD username
MYSQL_HOME_FIELD homedir
MYSQL_NAME_FIELD name
MYSQL_MAILDIR_FIELD maildir
MYSQL_QUOTA_FIELD quota
MYSQL_SELECT_CLAUSE SELECT username,password,"",uidnumber,gidnumber, \
CONCAT('/home/domains/',homedir), \
CONCAT('/home/domains/',maildir), \
quota, \
name \
FROM mailbox \
WHERE username = '$(local_part)@$(domain)'
2,修改authmysqlrc权限
[root@localhost postfix]# chown daemon.daemon /etc/authlib/authmysqlrc
[root@localhost postfix]# chmod 660 /etc/authlib/authmysqlrc
3,extmail加载数据库连接模块
vim /etc/authlib/authdaemonrc
//找到相应地方,改成如下内容
authmodulelist="authmysql"
authmodulelistorig="authmysql"
4,改变authdaemon权限
[root@localhost authlib]# chmod 755 /var/spool/authdaemon/
四,配置maildrop
在安装maildrop的时候,系统会自动创建vuser用户及vgroup用户组,专门用于邮件的存储
1,修改/etc/postfix/master.cf
maildrop  unix  -       n       n       -       -       pipe   //63行,改成这样
flags=DRhu user=vuser argv=maildrop -w 90 -d ${user}@${nexthop} ${recipient} ${user} ${extension} {nexthop}  //72行,改成这样
五,配置Extmail
cd /var/www/extsuite/extmail
cp webmail.cf.default webmail.cf
vim webmail.cf
更改成下面的内容
SYS_MYSQL_USER = extmail
SYS_MYSQL_PASS = extmail
SYS_MYSQL_DB = extmail
//Nginx启动用户我会改vuser:vgroup,所以这里的目录权限也要改一下
chown -R vuser:vgroup /var/www/extsuite/extmail/cgi/
六,配置Extman
1,修改权限
//Nginx启动用户我会改vuser:vgroup,所以这里的目录权限也要改一下
chown -R vuser:vgroup /var/www/extsuite/extman/cgi/
2,配置基本库目录
//链接基本库到Extmail
mkdir /tmp/extman
chown -R vuser:vgroup /tmp/extman
3,数据库初始化
/etc/init.d/mysqld start
vim /var/www/extsuite/extman/docs/init.sql
:1,$s/extmail.org/51yip.com/g //默认是extmail.org,在这里要换成自己的域名
//敢入数据库
[root@localhost docs]# mysql -u root -p < /var/www/extsuite/extman/docs/extmail.sql
Enter password:
[root@localhost docs]# mysql -u root -p < /var/www/extsuite/extman/docs/init.sql
Enter password:
4,copy虚拟域和虚拟用户的配置文件
cd /var/www/extsuite/extman/docs
[root@localhost docs]# cp mysql_virtual_alias_maps.cf mysql_virtual_sender_maps.cf \
mysql_virtual_domains_maps.cf mysql_virtual_mailbox_maps.cf /etc/postfix/
如果出现下面的,就证明成功了,extmail的服务都启动后在测试
[root@localhost authlib]# authtest -s login postmaster@51yip.com extmail
Authentication succeeded.
Authenticated: postmaster@51yip.com (uid 1000, gid 1000)
Home Directory: /home/domains/51yip.com/postmaster
Maildir: /home/domains/51yip.com/postmaster/Maildir/
Quota: 104857600S
Encrypted Password: $1$phz1mRrj$3ok6BjeaoJYWDBsEPZb5C0
Cleartext Password: extmail
Options: (none)
如果报以下错误 Authentication FAILED: Input/output error,请检查authmysqlrc这个文件是不是配置正确,这个问题挡了我有2个多小时。
七, 配置Extman后台的图形化日志功能
启动mailgraph_ext
/usr/local/mailgraph_ext/mailgraph-init start
启动cmdserver(在后台显示系统信息)
/var/www/extsuite/extman/daemon/cmdserver -v -d
加入开机自启动:
echo "/usr/local/mailgraph_ext/mailgraph-init start" >> /etc/rc.local
echo "/var/www/extsuite/extman/daemon/cmdserver -v -d" >> /etc/rc.local
八,配置Courier-imap
vim /usr/lib/courier-imap/etc/imapd
IMAPDSTART=NO //把YES改成NO
vim /usr/lib/courier-imap/etc/imapd-ssl
IMAPDsslSTART=NO //把YES改成NO
九,配置cyrus-sasl
[root@localhost extman]# cat /usr/lib/sasl2/smtpd.conf
 pwcheck_method: authdaemond
 log_level: 3
 mech_list: PLAIN LOGIN
 authdaemond_path:/var/spool/authdaemon/socket
十,启动postfix,courier-imap,courier-authlib
1,启动postfix
[root@localhost extman]# /etc/init.d/postfix start
Starting postfix: [确定]
2,启动courier-authlib
[root@localhost authlib]# /etc/init.d/courier-authlib start
Starting Courier authentication services: authdaemond //显示这样的内容说明安装成功了
3,启动courier-imap
[root@localhost extman]# /etc/init.d/courier-imap start
Starting Courier-IMAP server: pop3 pop3-ssl //显示这样的内容说明安装成功了
4,查看启动进程
[root@localhost extman]# netstat -tpnl
Active Internet connections (only servers)
Proto Recv-Q Send-Q Local Address               Foreign Address             State       PID/Program name
tcp        0      0 127.0.0.1:2208              0.0.0.0:*                   LISTEN      3425/./hpiod
tcp        0      0 0.0.0.0:740                 0.0.0.0:*                   LISTEN      3102/rpc.statd
tcp        0      0 127.0.0.1:9001              0.0.0.0:*                   LISTEN      9028/fcgiwrap
tcp        0      0 0.0.0.0:3306                0.0.0.0:*                   LISTEN      4637/mysqld
tcp        0      0 0.0.0.0:111                 0.0.0.0:*                   LISTEN      3052/portmap
tcp        0      0 0.0.0.0:22                  0.0.0.0:*                   LISTEN      3448/sshd
tcp        0      0 127.0.0.1:631               0.0.0.0:*                   LISTEN      3462/cupsd
tcp        0      0 0.0.0.0:25                  0.0.0.0:*                   LISTEN      10003/master
tcp        0      0 127.0.0.1:2207              0.0.0.0:*                   LISTEN      3430/python
tcp        0      0 :::995                      :::*                        LISTEN      9296/couriertcpd
tcp        0      0 :::110                      :::*                        LISTEN      9290/couriertcpd
tcp        0      0 :::22                       :::*                        LISTEN      3448/sshd
tcp        0      0 :::25                       :::*                        LISTEN      10003/master
十一,配置Nginx
1,配置nginx.conf
[root@localhost nginx]# vim /etc/nginx/nginx.conf
user             vuser vgroup;  //把启动用户改成vuser
2,配置Nginx虚拟机
[root@localhost conf.d]# cat /etc/Nginx/conf.d/extmail.conf    //extmail的虚拟机
server
{
 listen       8080;
 server_name  51yip.com;
 index index.html index.htm index.php index.cgi;
 root  /var/www/extsuite/extmail/html/;

 location ~ .*\.(gif|jpg|jpeg|png|bmp|swf)$
 {
 rewrite ^/extmail/default/images/(.*) /default/images/$1 break;
 expires     30d;
 }

 location ~ .*\.(js|css)?$
 {
 rewrite ^/extmail/default/(.*) /default/$1 break;
 expires     1h;
 }

 location /extmail/cgi/ {
 root  /var/www/extsuite/extmail/cgi;
 fastcgi_pass          127.0.0.1:9001;
 fastcgi_index         index.cgi;
 rewrite ^/extmail/cgi/(.*)\.cgi /$1.cgi break;
 include               fastcgi.conf;
 }
 log_format  extmaillog  '$remote_addr - $remote_user [$time_local] "$request" '
 '$status $body_bytes_sent "$http_referer" '
 '"$http_user_agent" $http_x_forwarded_for';
 access_log  /var/log/extmaillog.log  extmaillog;
}

[root@localhost conf.d]# cat /etc/Nginx/conf.d/extman.conf   //extman虚拟机
server
{
 listen       8081;
 server_name  51yip.com;
 index index.html index.htm index.php index.cgi;
 root  /var/www/extsuite/extman/html/;

 location ~ .*\.(gif|jpg|jpeg|png|bmp|swf)$
 {
 rewrite ^/extman/default/images/(.*) /default/images/$1 break;
 expires     30d;
 }

 location ~ .*\.(js|css)?$
 {
 rewrite ^/extman/default/(.*) /default/$1 break;
 expires     1h;
 }

 location /extman/cgi/ {
 root  /var/www/extsuite/extman/cgi;
 fastcgi_pass          127.0.0.1:9001;
 fastcgi_index         index.cgi;
 rewrite ^/extman/cgi/(.*)\.cgi /$1.cgi break;
 include            fastcgi.conf;
 }
 log_format  extmanlog  '$remote_addr - $remote_user [$time_local] "$request" '
 '$status $body_bytes_sent "$http_referer" '
 '"$http_user_agent" $http_x_forwarded_for';
 access_log  /var/log/extmanlog.log  extmanlog;
}
十二,启动fcgiwrap,Nginx
extmail是用perl写的,nginx并不能运行perl的cgi程序,所以我们要加单独加
spawn-fcgi -f /usr/local/bin/fcgiwrap -a 127.0.0.1 -p 9001 -F 3 -P /var/run/fastcgi-c.pid
/etc/init.d/nginx start
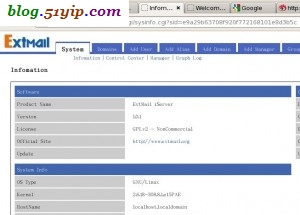
到这儿,extmail就全部搭建好了,来看一下效果图:

extmail页面
url是http://你的域名:8080/,这里是不能登录的因为没有用户,我们要在extman添加用户后才可以在这里登录

extman管理界面
url是http://你的域名:8081/,登录的用户名是root@你的域名,密码是extmail*123*

